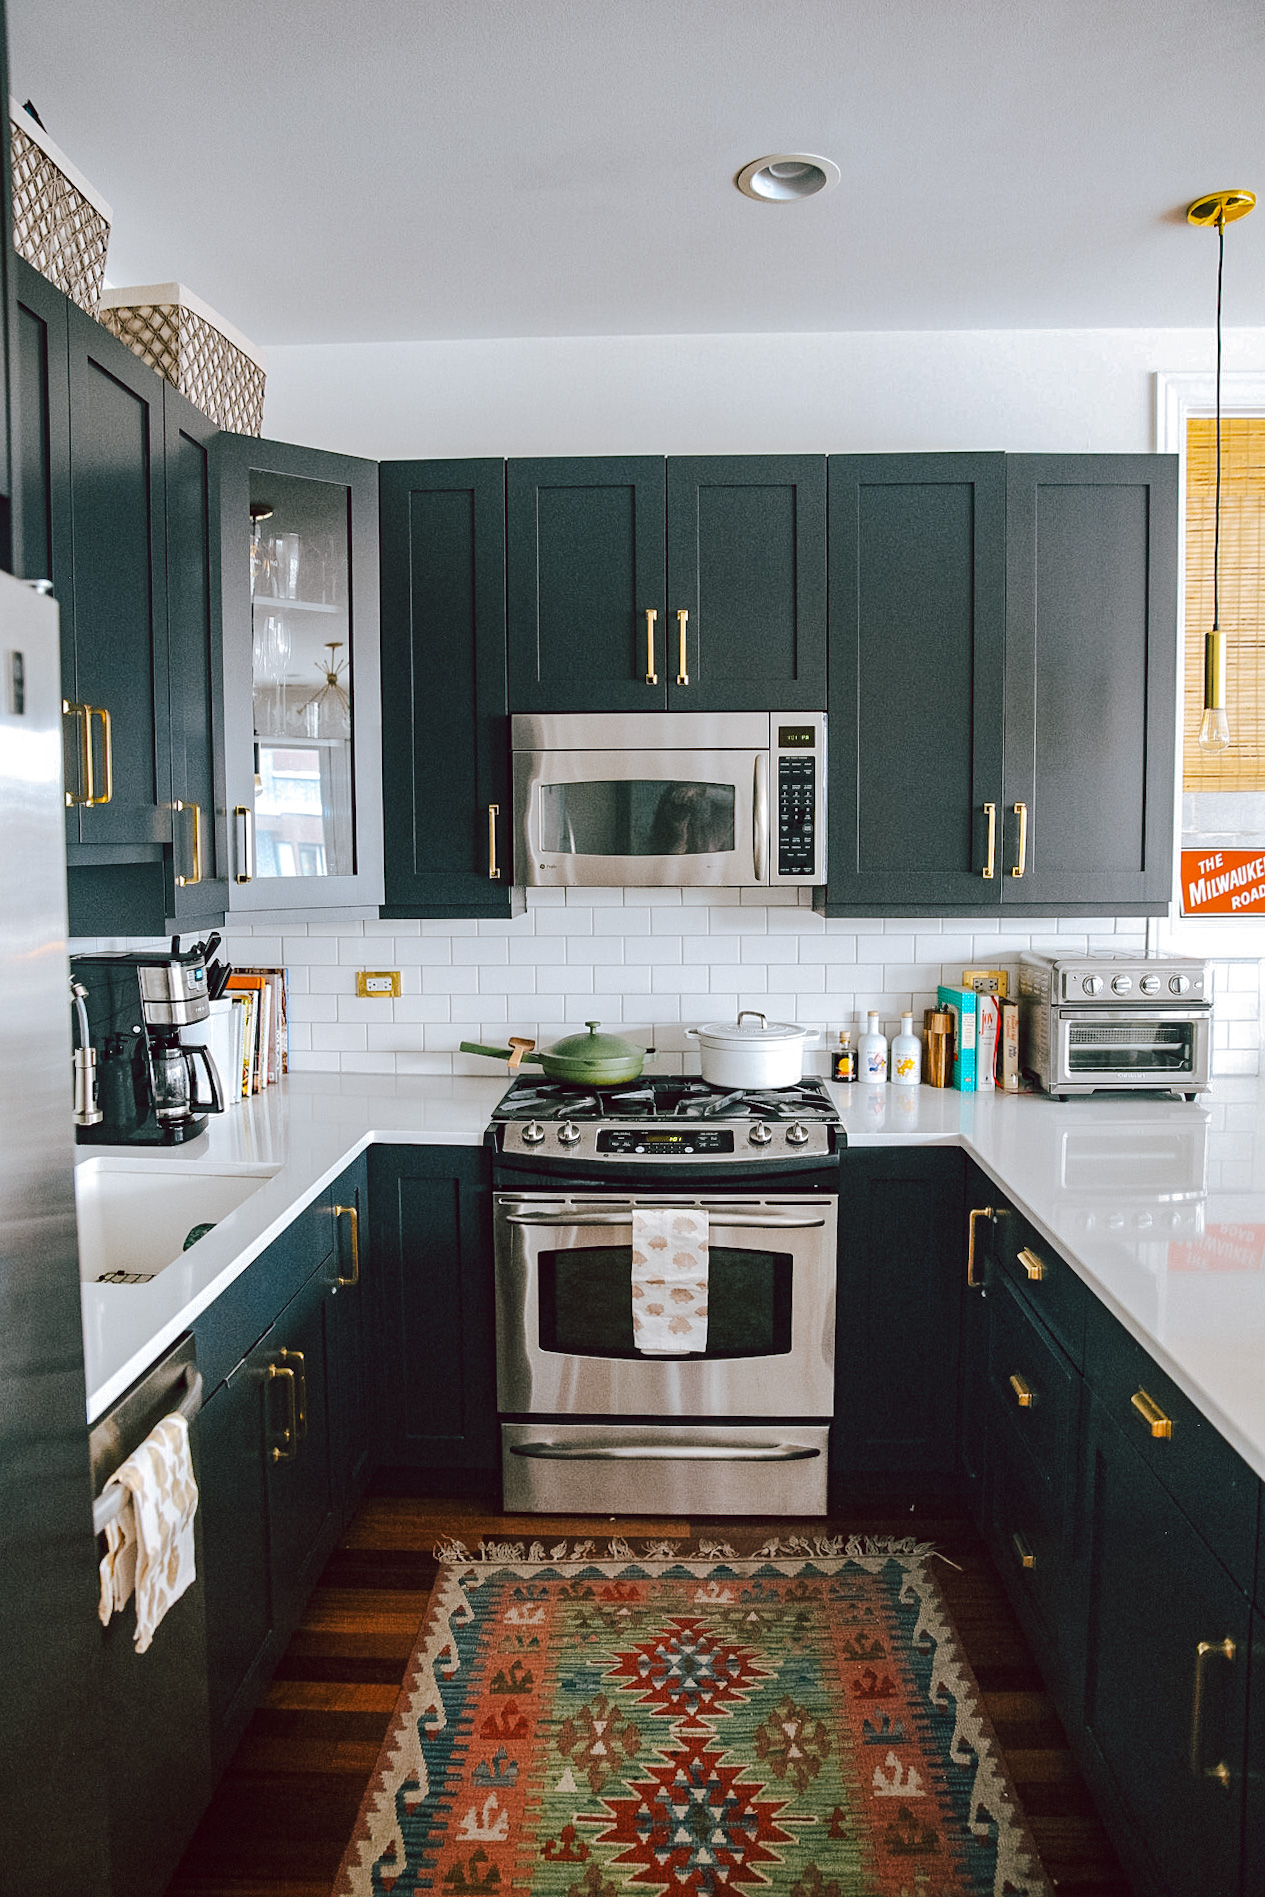
Our kitchen before/after is HERE! You’ve only been asking for it for 8 months! (There’s a reason I’m not a home blogger? ????)
Ever since we put the offer in on our condo (going on FIVE years ago, wow) we wanted to redo the kitchen. The thing is, we just never got around to it. Why? Well…to be honest, I really hate projects. ???? I do not enjoy planning anything. It’s exhausting to do all the research, project-manage, make ALL THE DECISIONS–the list goes on. (Based on this factor, it will be a miracle if this baby girl has a nursery by the time she arrives in June.) It just kept falling down the priority list. And also, the other obvious factor–it’s expensive!
There was nothing wrong with the kitchen. It was just built in the mid 2000’s–as is very evident in the design choices. Certainly not our style, but it was functional nonetheless!
Finally, (conveniently ????) in January of 2020, we decided–NOW it’s time to re-do the kitchen! Then of course, covid happened and put a little bump in our plans for several months, but this past summer, we were able to resume, and got it done! ????????
(And then…8 months somehow passed before I got around to shooting it and making it into a blog post. ????)
So today, finally, here is the before/after and overview of everything we did!
Our New Kitchen! Before/After, and all about our remodel
Budget:
I have received a lot of questions about our budget for this kitchen reno–I will be honest and say again, I hate managing projects, planning, and coordinating details of any kind ???? so I am not the kind of person to make a spreadsheet and manage everything line by line. Therefore, I can’t give you an exact cost because I never truly added it all up, but we wanted to try and keep our costs around $10K and our rough estimates came in pretty close to that. (Keep in mind this did not include appliances as we haven’t touched those yet, but still, I’m really happy with that price!) I hope that helps!
Okay, let’s jump into the details!
The Before:
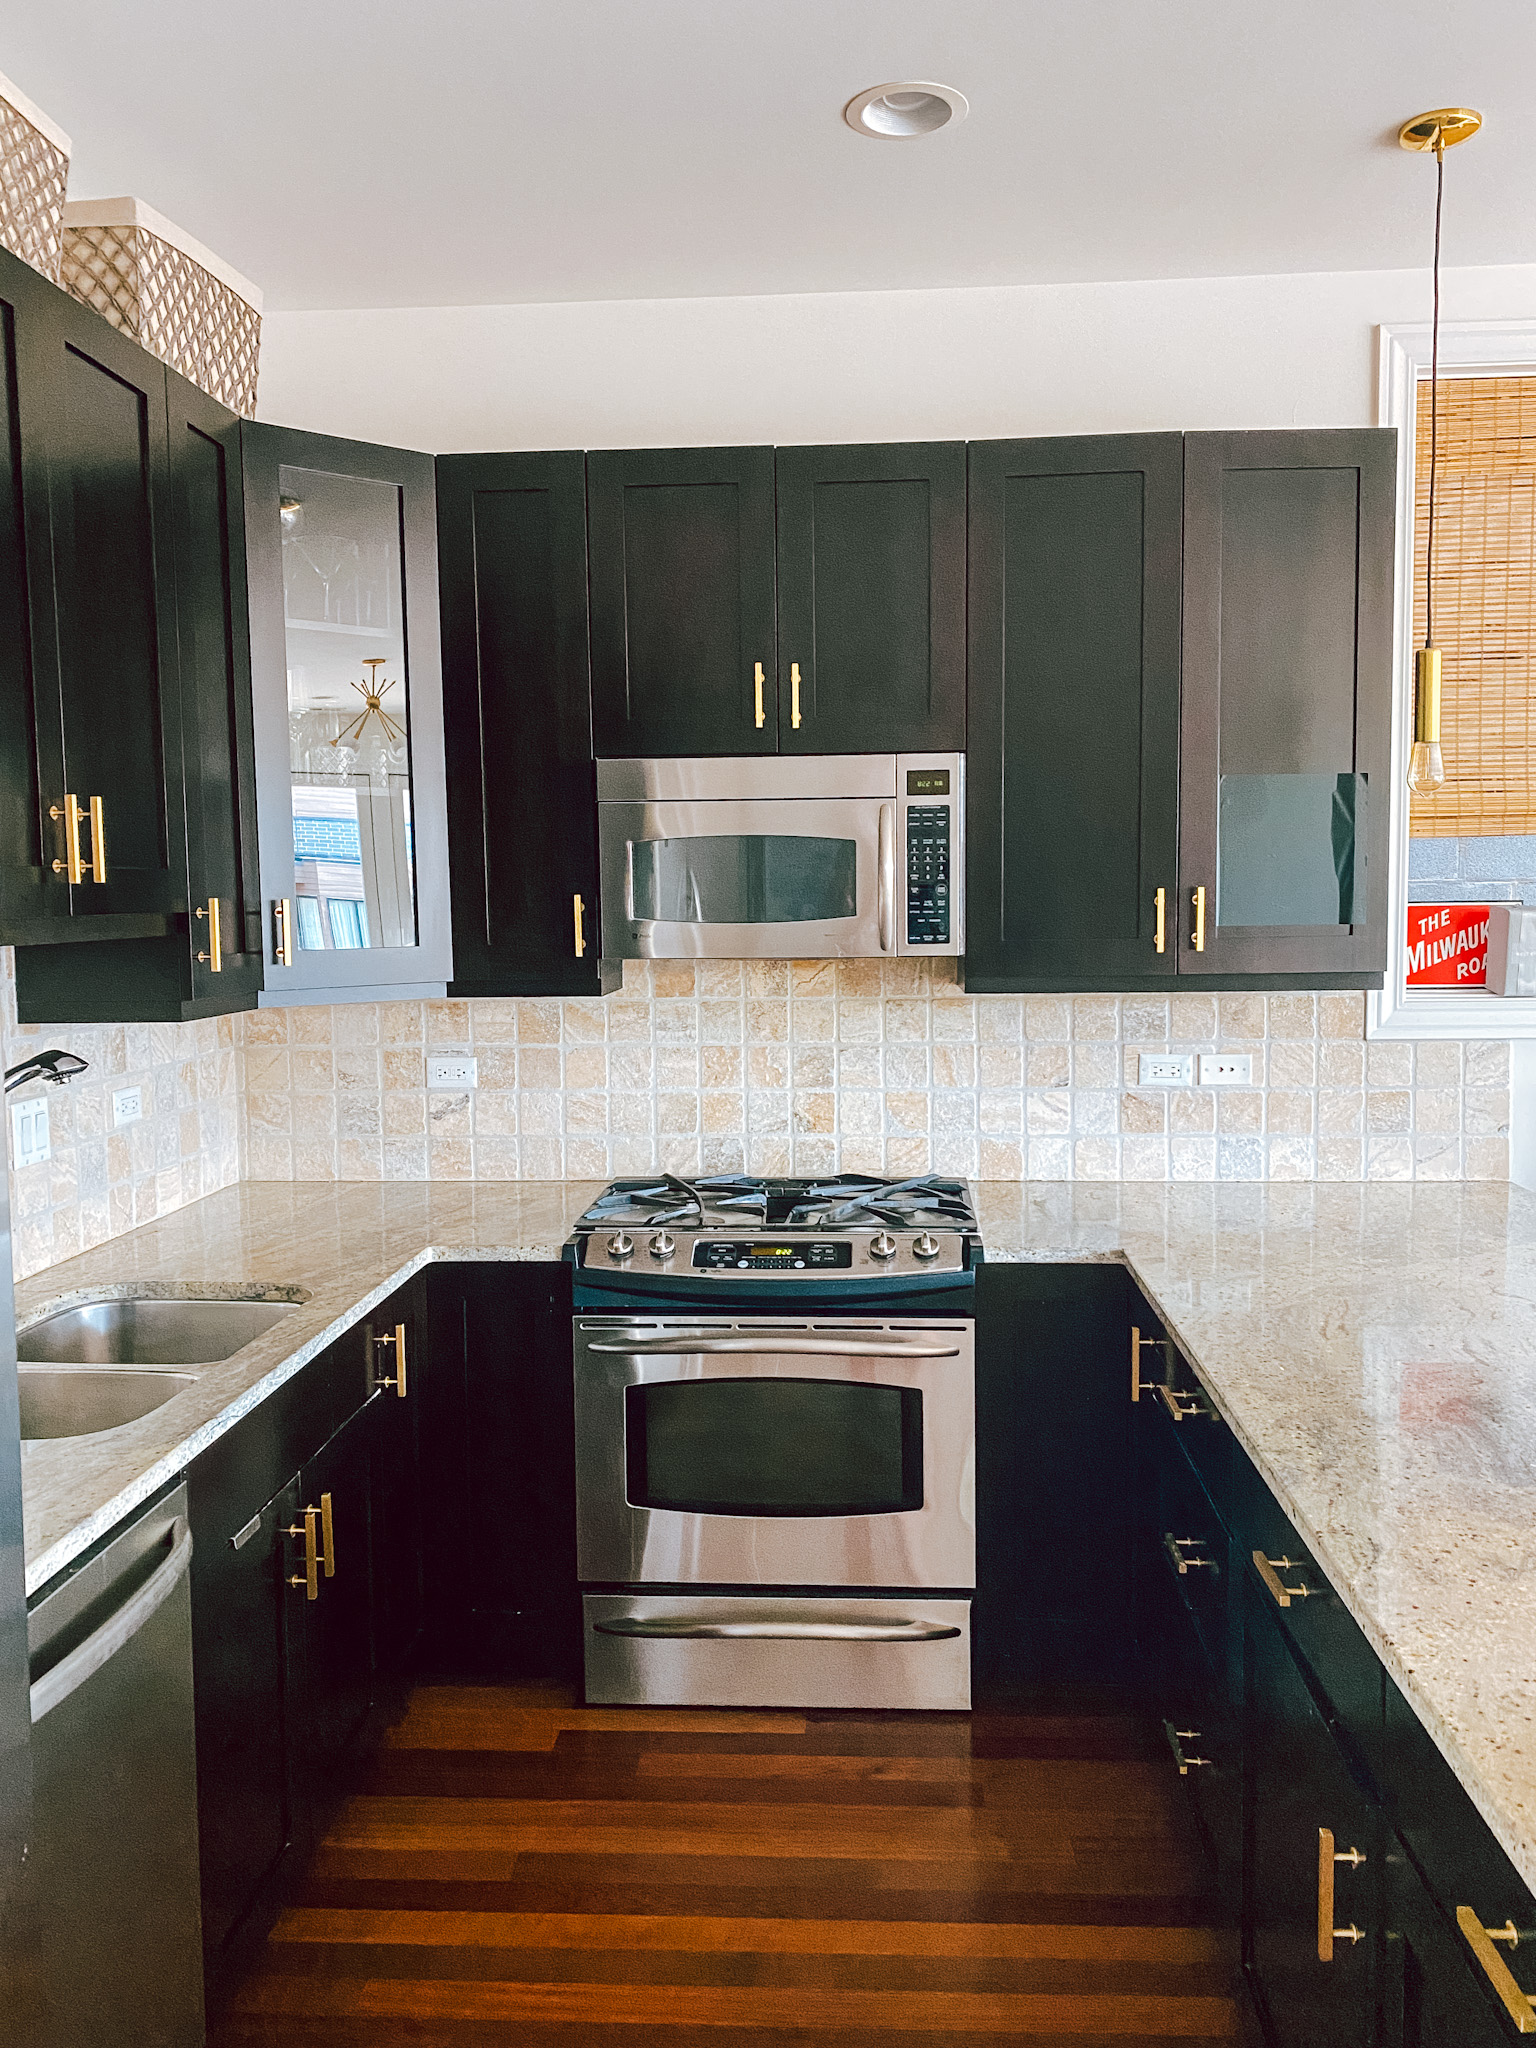
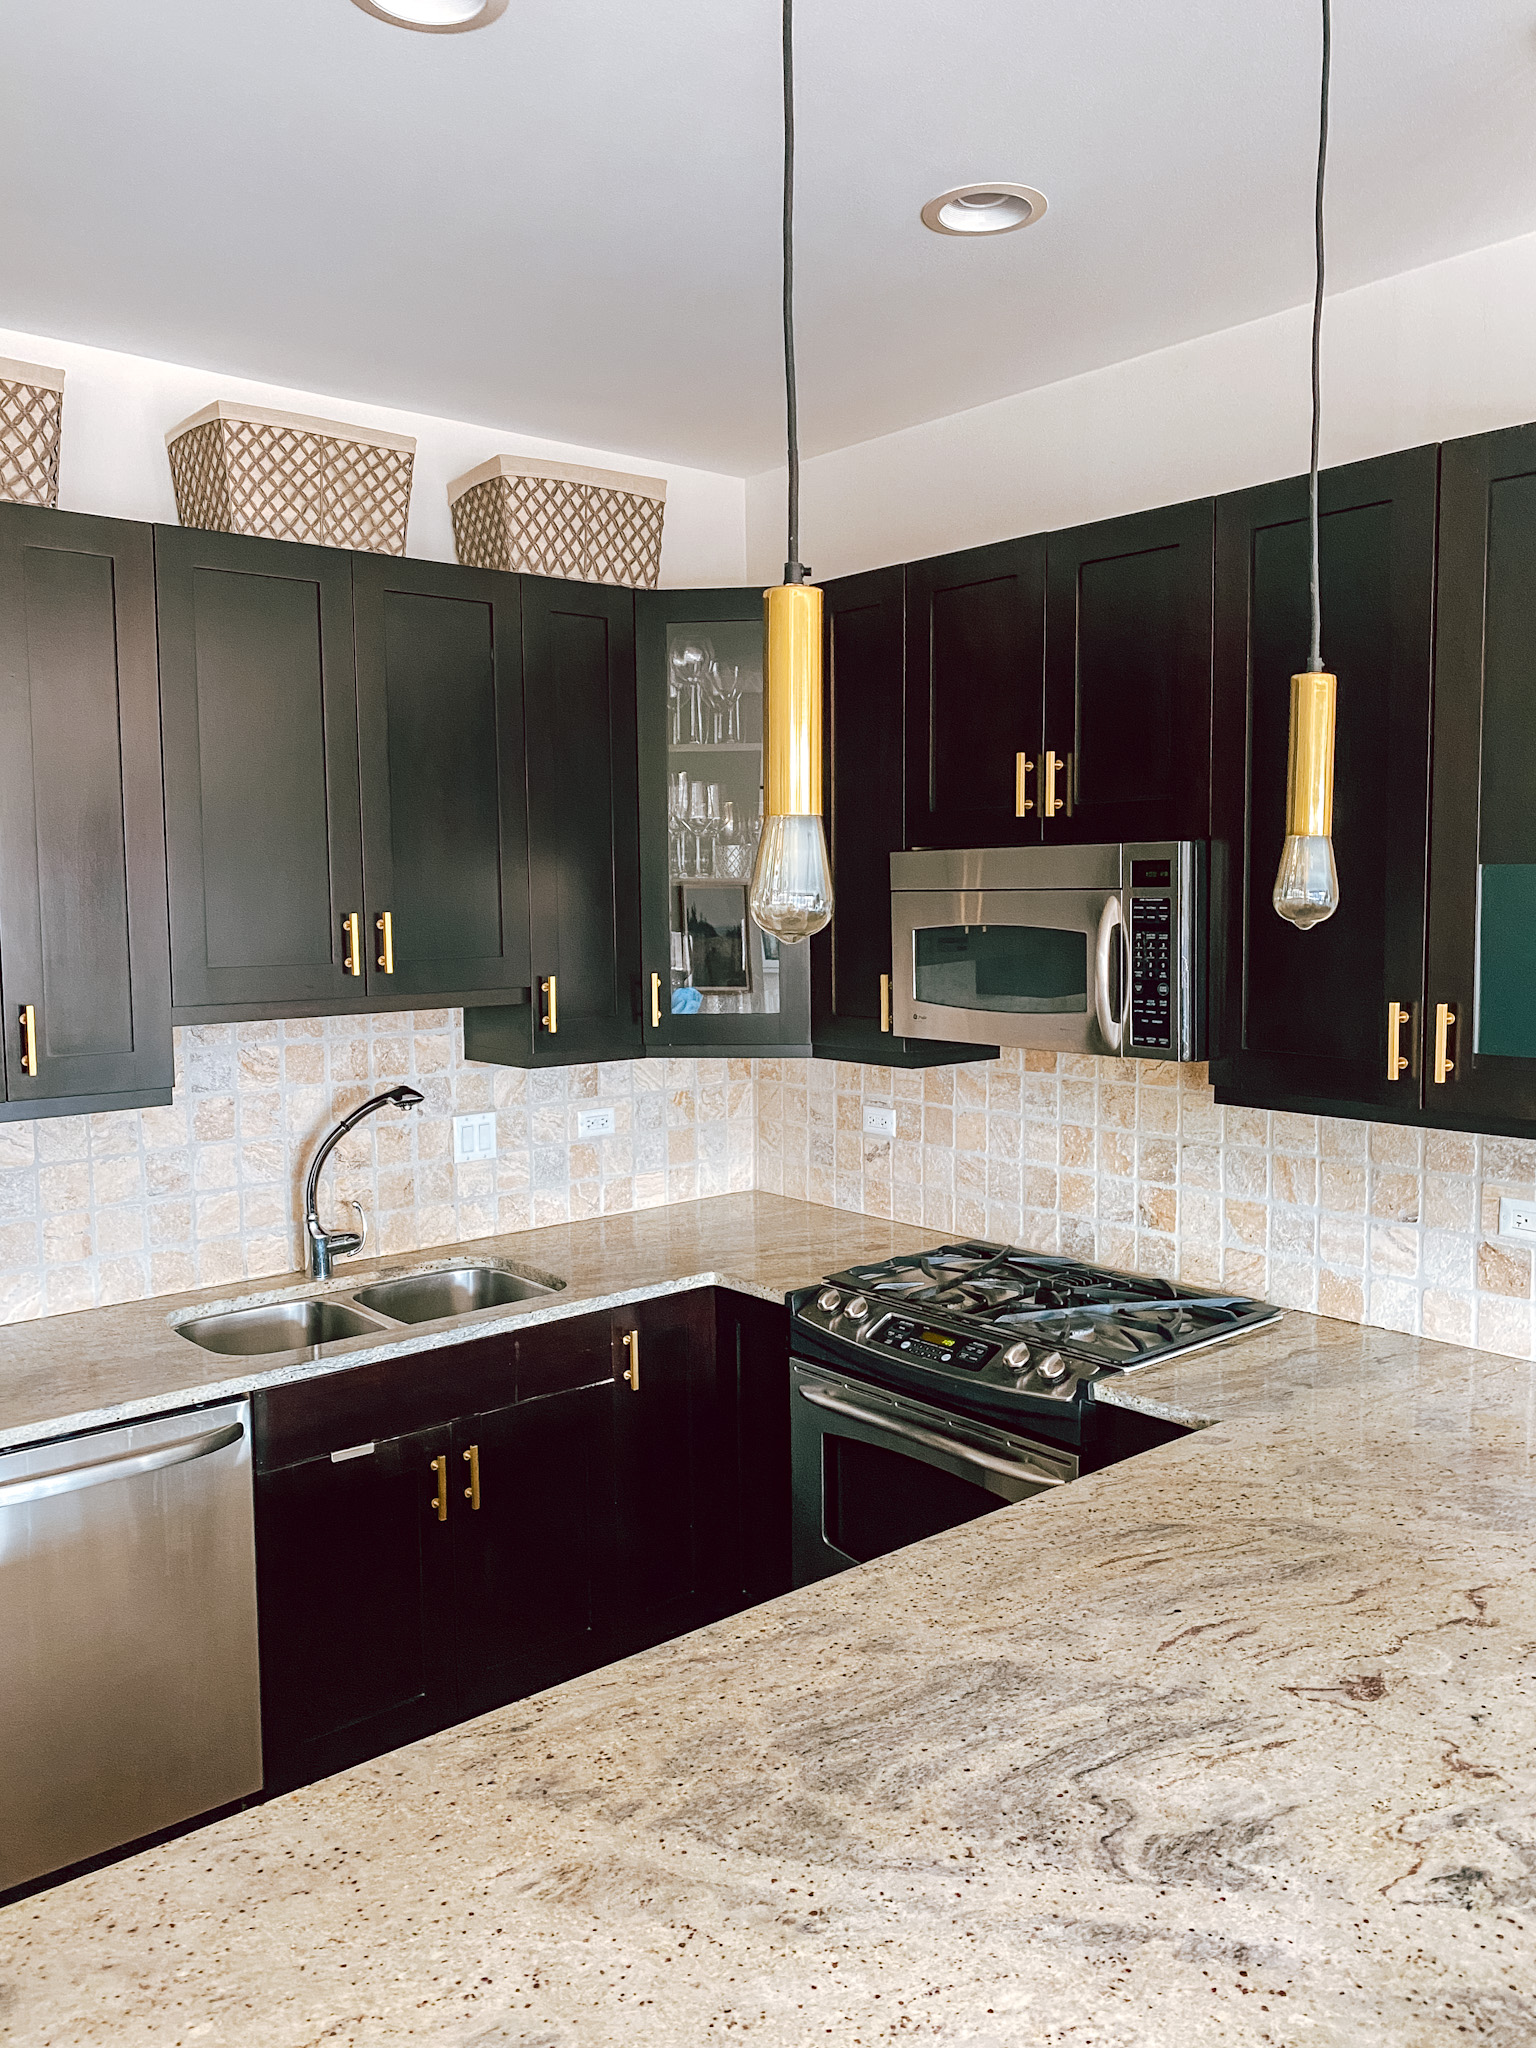
Here you can see the before–when we moved in I did swap the existing builder-grade hardware for gold pulls, and also replaced the pendants–you can see those details in this post!
After: Our Kitchen Upgrade Details
The countertops:
The bulk of the money spent went into the countertops, but we got a really good deal on them! We ended up going with Silestone Statuario Quartz, and getting them through Home Depot when they had a huge sale going on. If you can, I would HIGHLY recommend waiting for a sale because we got ours for a significant discount. I priced out local countertop suppliers, but nobody could match the Home Depot price. We ended up paying around $6,500.
Types of quartz we considered:
[one-third-first] [/one-third-first][one-third]

[/one-third][one-third]

[/one-third]
Above: Other contenders: Silestone Pearl Jasmine, Silestone Lagoon, Silestone Statuario (the winner!)
I knew the look I was going for, and we also wanted to do it relatively affordably. I don’t need the fanciest, top-of-the-line kitchen, I just want it to look beautiful and clean aesthetically. That being said, we landed on quartz because it allowed us to accomplish all of these goals–pretty, durable, and relatively affordable!
Like most things, I turned to Kelly for advice, as she had just redone her kitchen counters. I loved the way hers looked. And she also went through Home Depot, scoring her counters at a discount and had a great experience.
She also told me that Silestone Statuario Quartz was the first one she liked right off the bat. She did a ton of research, waffled over her decision, then ended up coming back to Statuario, and assured me that I would do the same. So I should just bite the bullet and go with Statuario and save myself the trouble. ????
Well, I didn’t listen to her, but she was right. The hardest part about working with Home Depot is that they didn’t have full-sized slabs of the quartz. So the awesome designer who we worked with at Home Depot (shout out to Wendel at the North Ave location) suggested I go to the Consentino tile showroom and warehouse–that they would have all the Silestone slabs I was considering. And I’d be able to walk through their warehouse (hardhat and all) to view them.
I’m so glad I did this because seeing everything at a grander scale REALLY changed how I viewed each sample.
I realized that Kelly was right, I actually didn’t like the others I THOUGHT I loved once I saw them full-sized. And I went with Statuario after all. I like how it’s very clean and minimal, it has some veining. But it’s not dramatic, and it’s only noticeable up close. Not that more dramatic veining isn’t pretty, it just wasn’t the look I was going for.
Tip:
I will say it’s also equally as important to view various tile samples still IN YOUR KITCHEN to ensure you can assess how warm/cool it looks in your own lighting. THEN once you narrow that down, then go and view them in a showroom (if you can find them).
[one-half-first]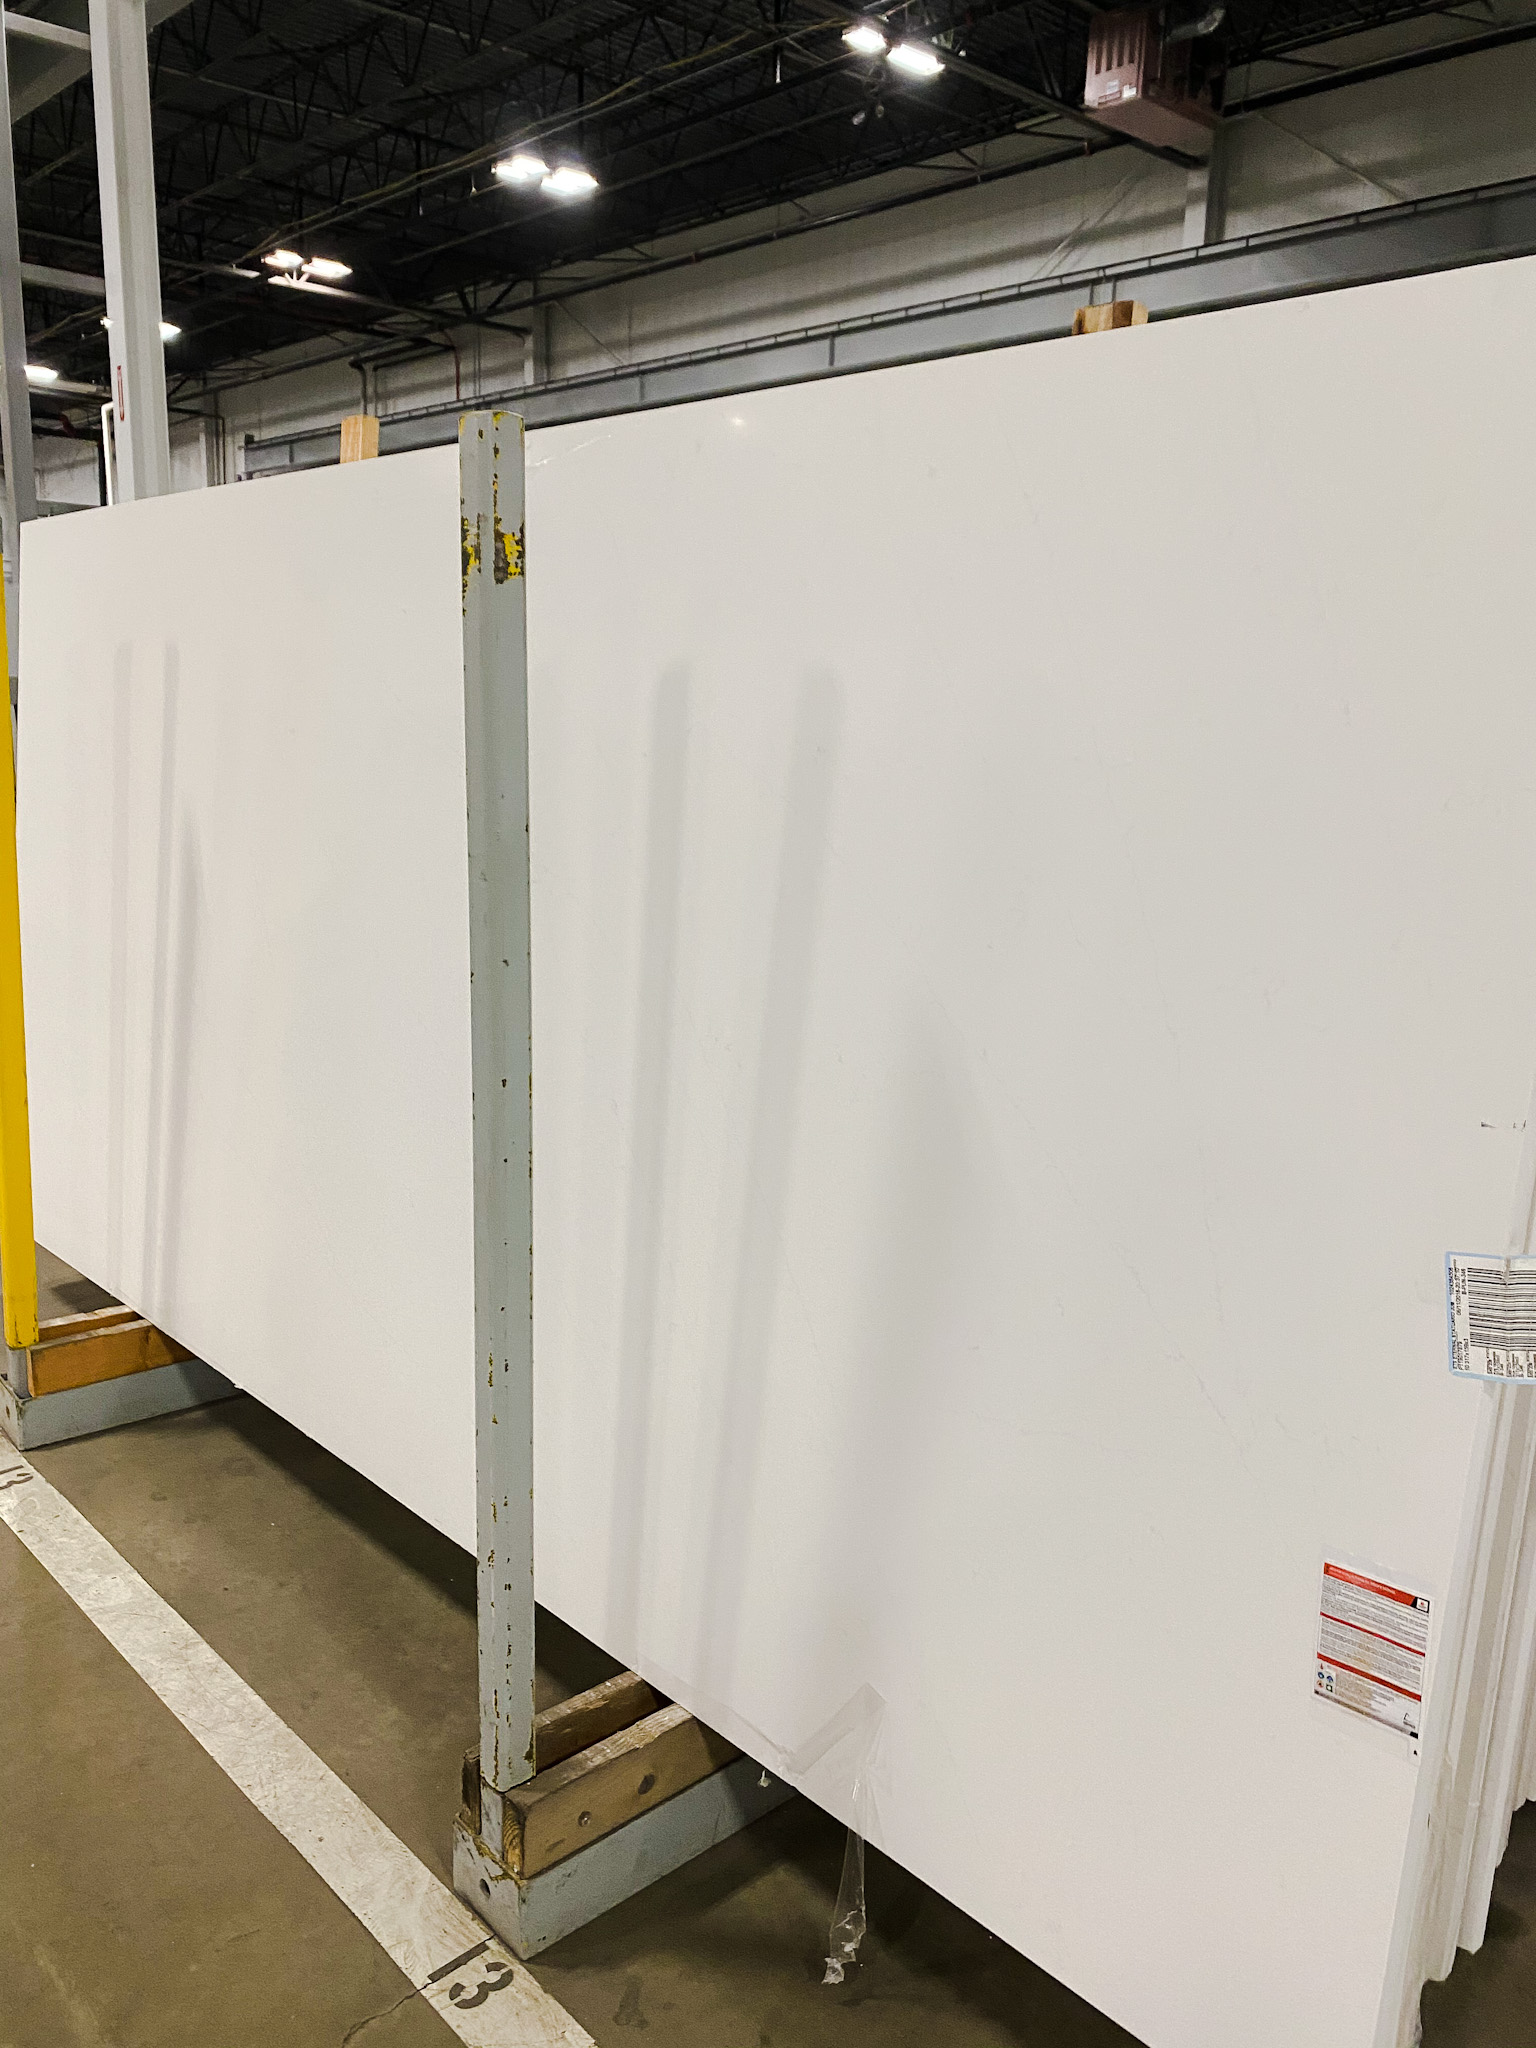 [/one-half-first][one-half]

[/one-half]
Once I decided on Statuario Quartz, I provided rough measurements of my kitchen (that I took myself) to Home Depot and they wrote up an estimate and handled the outsourcing of install to a third party–but you pay for it all at once through Home Depot.
You can include all kinds of things in your estimate depending on how handy you are. And how much you want to take on. For example, demo and haul away, plumbing hookup, etc.
We had them remove demo of our existing counters. And haul away from the estimate as we found a crew on Thumbtack to do that way more affordably. However, we had Home Depot include plumbing hookup because I was sick of piecemealing everything and it wasn’t that much of an upcharge. So I had them coordinate that part of figuring out the sink/plumbing, faucet, etc. Again, it’s up to you what you want them to include/not include. But you have lots of options!
After you get that sorted and contract through Home Depot, they contract out a counter company to do the install. And that company sends someone out to take exact measurements and you make the final decisions about where you want seams in the counters, etc, and then they order the countertops and set up the install date! They will also make final adjustments to your estimate/order at that time.
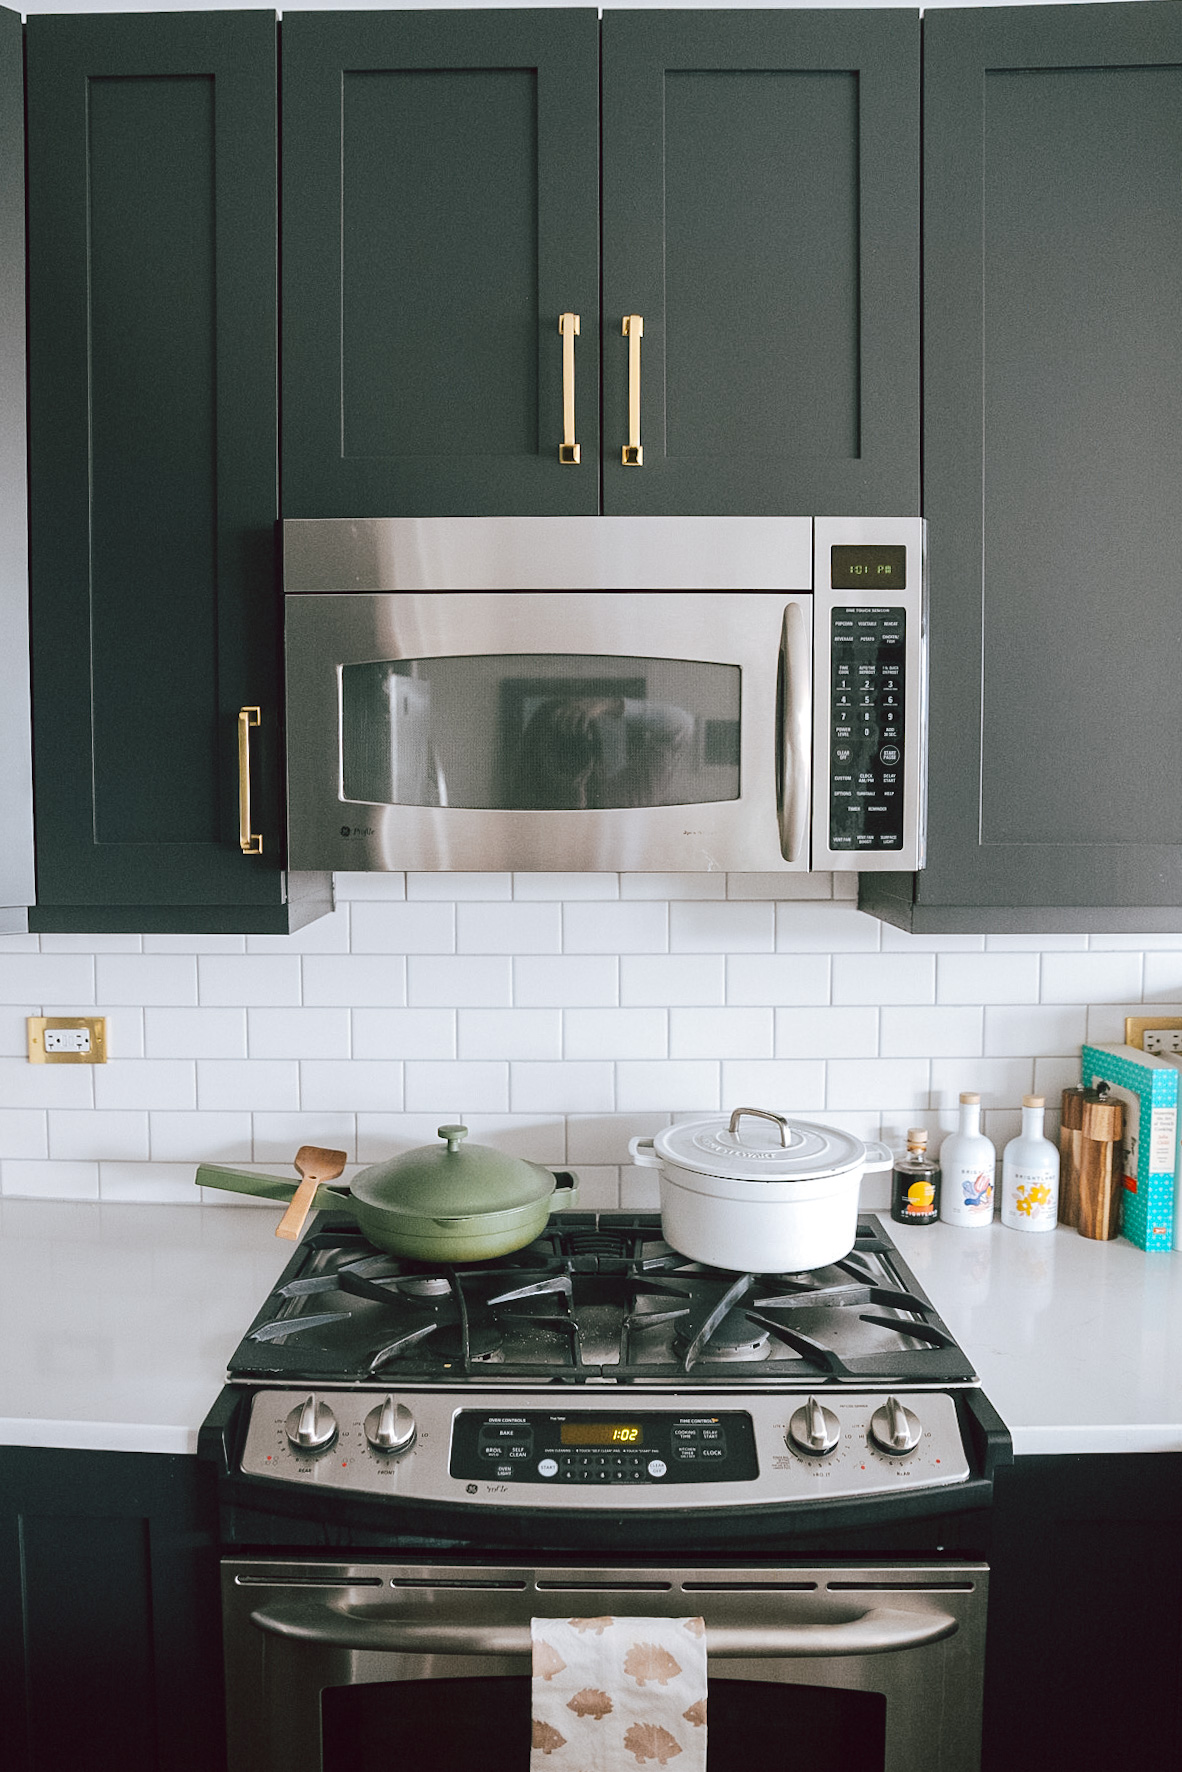
(I guess I didn’t clean the stove as thoroughly as I thought when I shot these pics. ???? Oh well!)
The cabinets:
We kept our existing cabinets (which are fine) and simply painted them and swapped out the hardware. The recommendations I got from designer friends for cabinet painters were outrageous–some ranging up to $10K for an estimate, so I turned to Thumbtack, which has never failed me before, and put up a posting that I was looking for cabinet painting.
After getting a handful of estimates, I decided on Fulton Revivals (formerly Blue Renovations) for the project based on how informational, responsive, and helpful Joe was, his reasonable pricing (ours came out under $3,500 for painting but your cost will depend on a variety of factors so make sure to get your own quotes for your own budgetary purposes) and the fact that he was one of the top-rated professionals on Thumbtack! The company is comprised of Joe and his brothers, all who have different specialties. (Joe is the paint guy!)
I also asked Joe if he could do our backsplash install as well, and turns out, he said yes! Which was great–one less person to have to find/hire. More on that below! More on the cabinets for now.
I told Joe the color I wanted, which we had decided was Benjamin Moore Midnight Oil.
A super dark blue/dark grey/soft black color which actually changes based on the light in the kitchen which I think is really cool. We had previously wanted to go with a dark green (Benjamin Moore Black Forest was our green of choice) but decided for resale value, this color was a little safer. I can have my green kitchen in our next house. ????
I highly recommend ordering a handful of samples from Samplize so you can see how they look in your kitchen and change with the light. They’re really cool, stick right on your cabinet or wall (so much better than buying samples of paint!)
What Joe did was color match Midnight Oil with his cabinet lacquer–as you want someone who uses a professional grade cabinet lacquer to spray the cabinets–this is what achieves the super smooth, professional-looking effect. (And why I would never attempt to DIY paint my own cabinets).
What I also liked is that Joe did all the painting on-site–he removes the fronts of the cabinets, tapes everything off, and sprays the cabinet frames and the cabinet fronts.
Many places take your cabinet fronts off-site and it takes much longer–but Joe did all our cabinets in a few days, so we weren’t without a kitchen for weeks!
We timed up our cabinet painting with our camping trip so we would be out of the house, and Joe worked around the clock for three days to make sure the project was finished on time, which was so appreciated. He texted me with updates every day and even sent me calendar invites for the days and times he would be there. I have never worked with a contractor that was more communicative and professional! Highly highly recommend Joe for all cabinet painting needs!
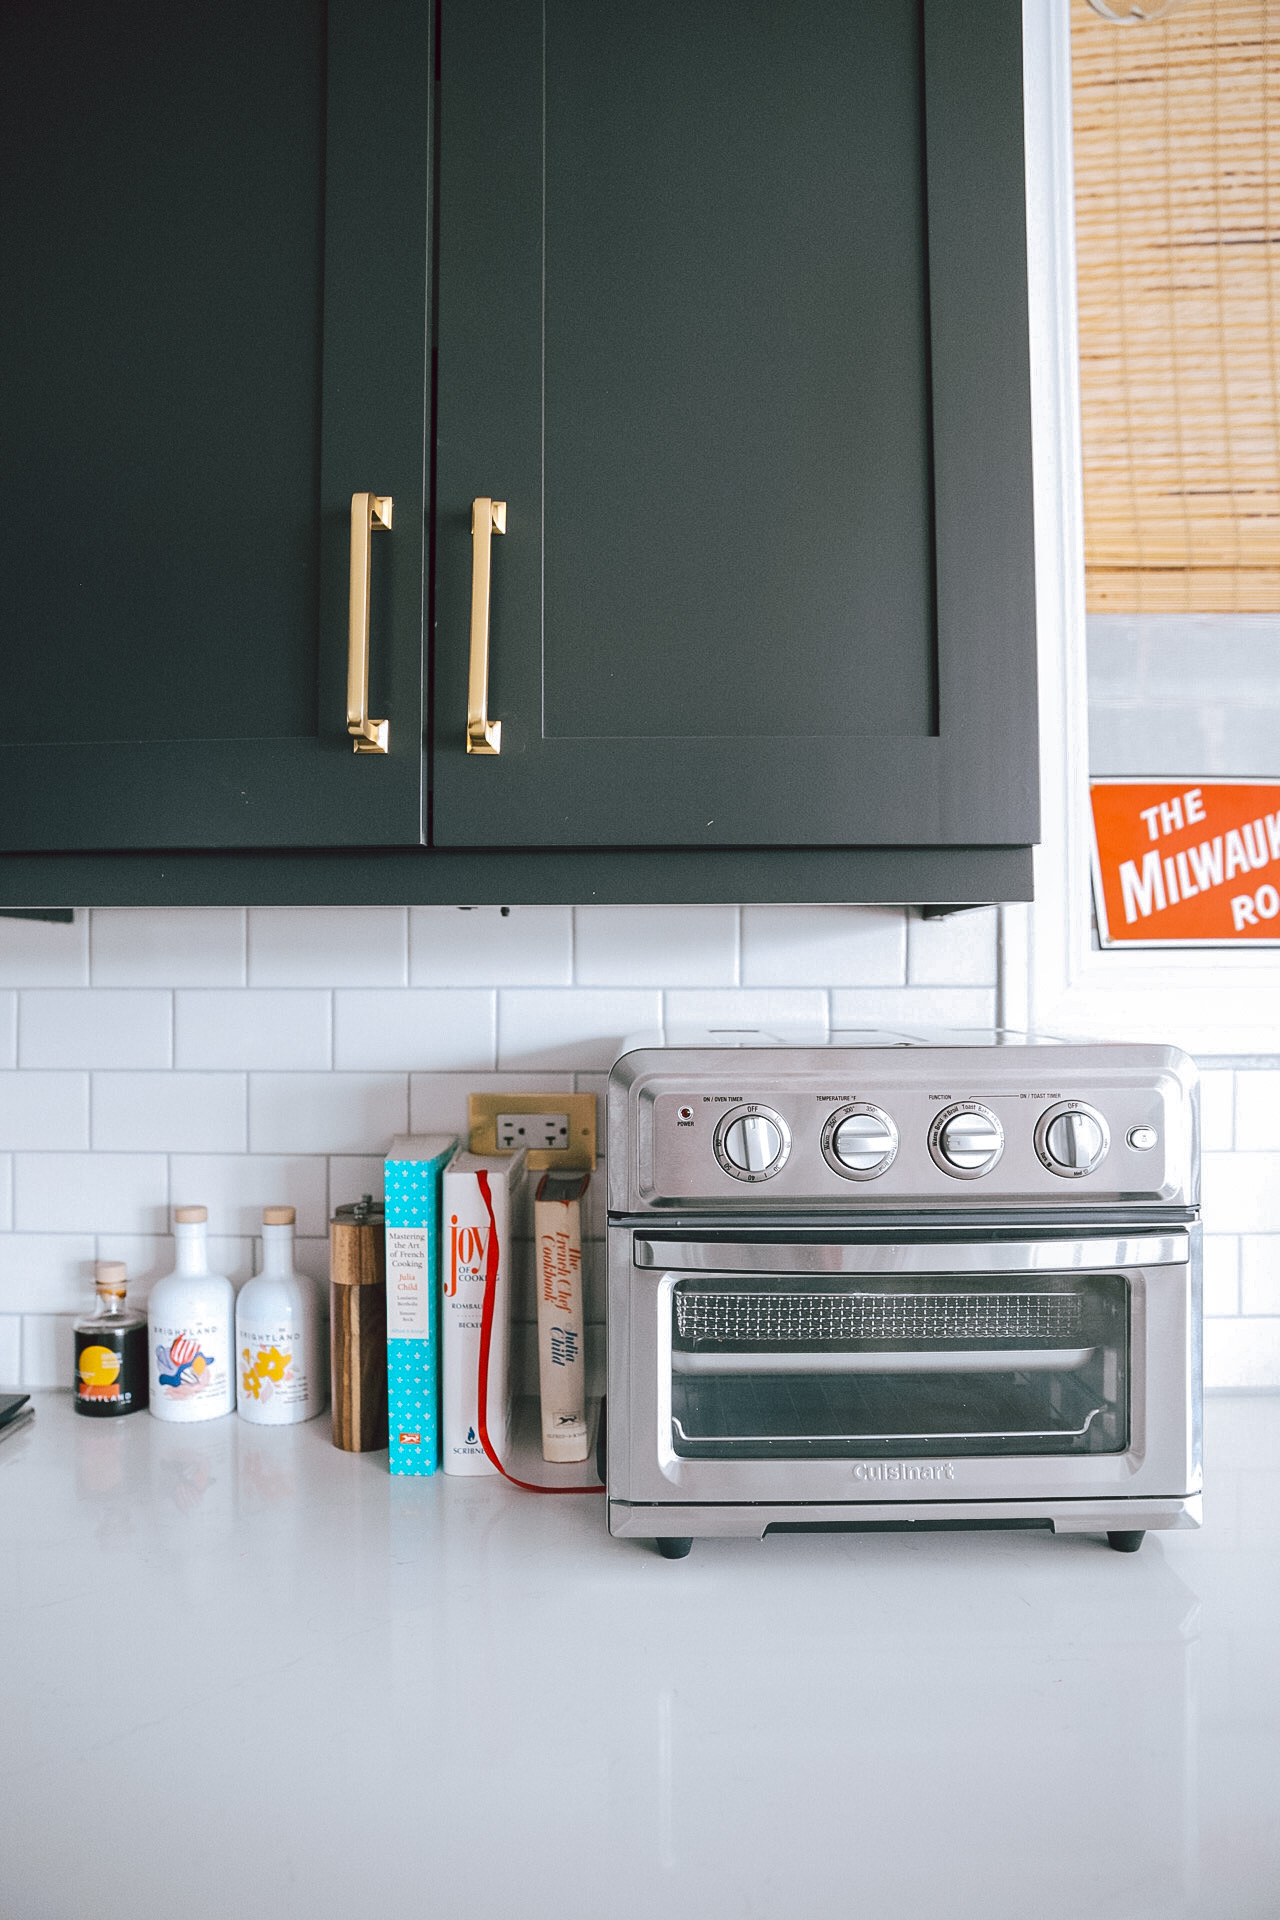
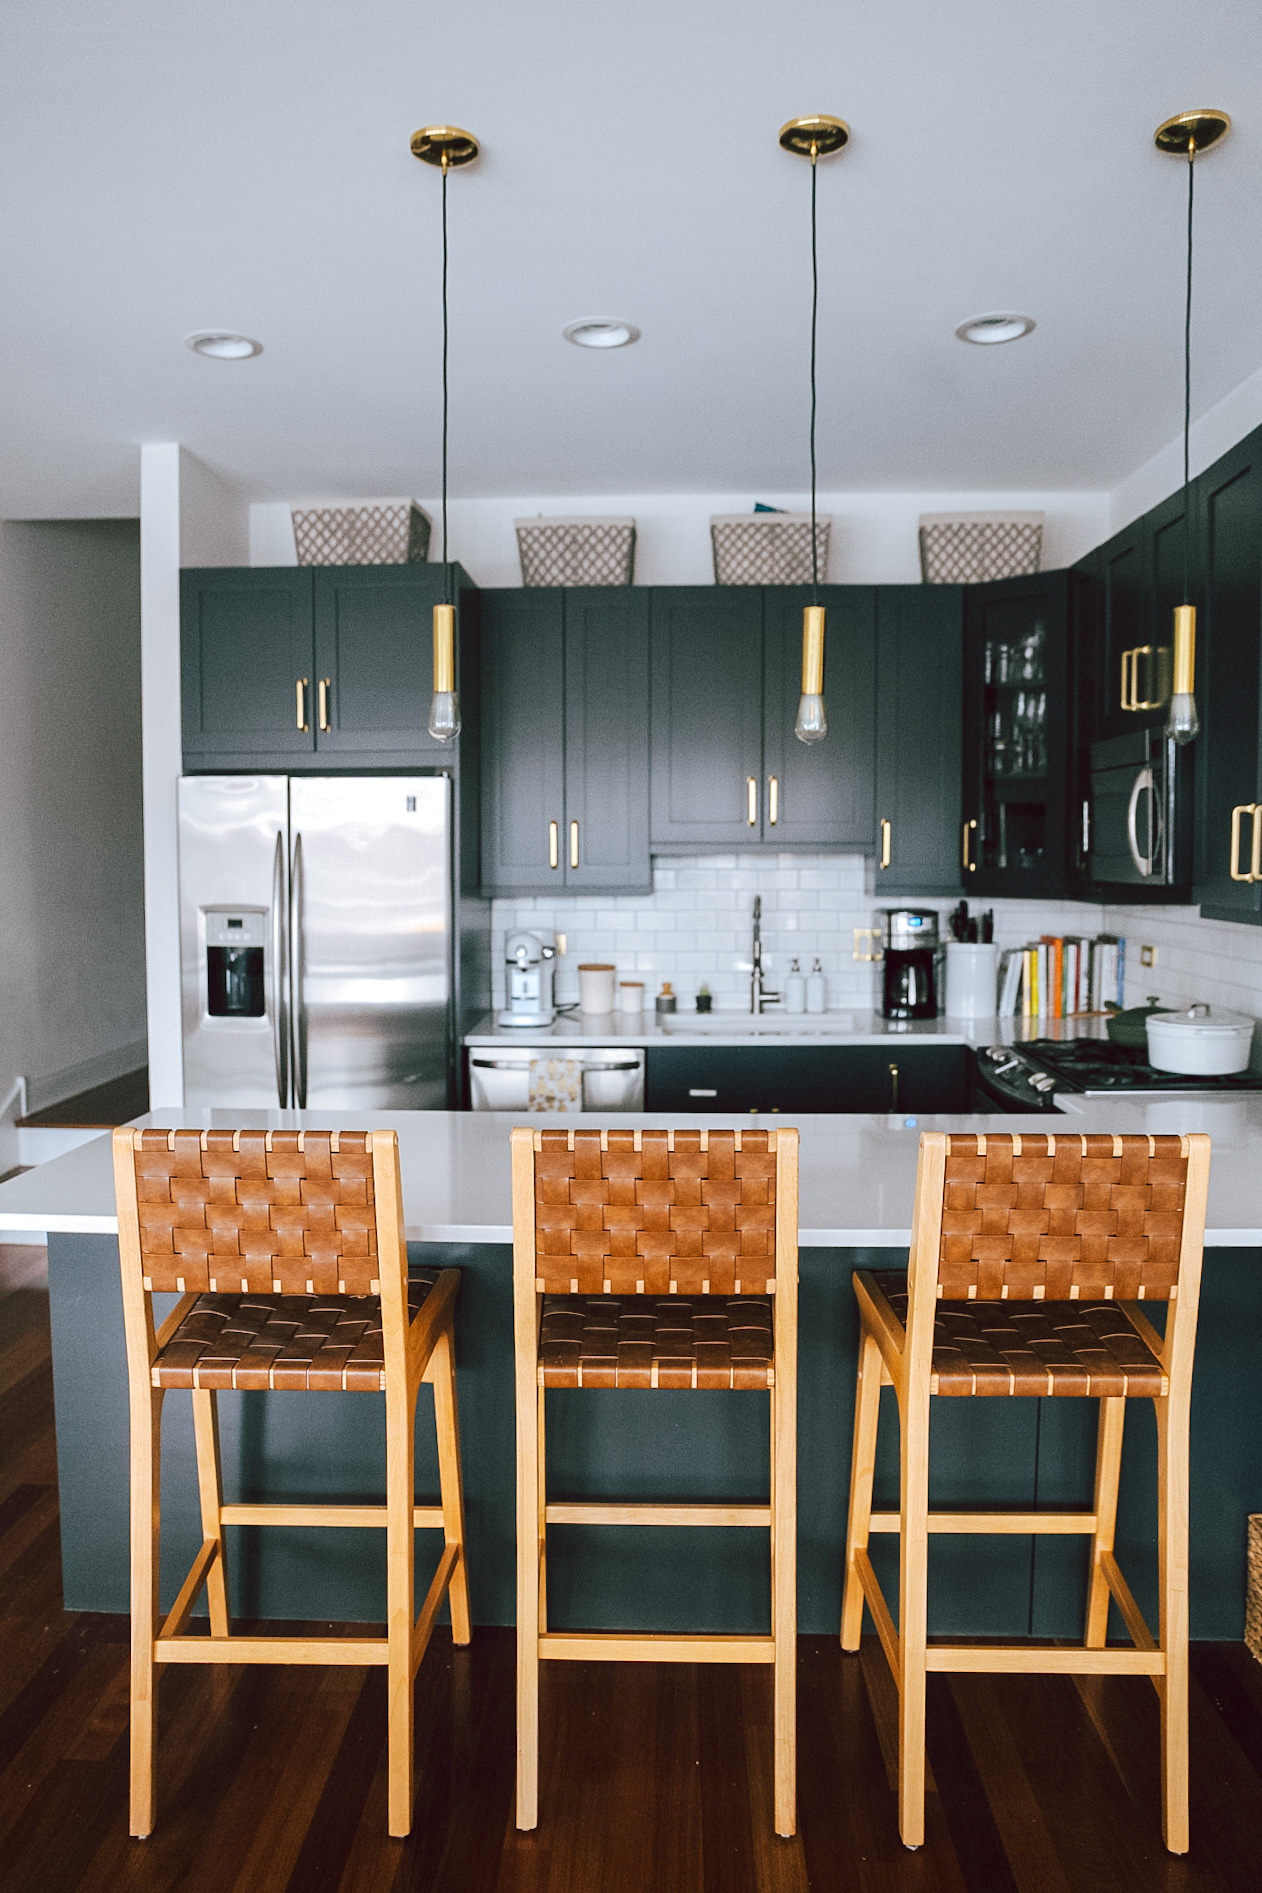
Barstools: Target (sold out, but maybe they’ll come back in stock!) Pendants: Jayson Home (also no longer available) Baskets: Old from The Container Store (IKEA always has great ones too!)
The backsplash:
Joe brought in his brother help him with the start of the backsplash (who is more experienced with tile, he explained) and then ended up finishing it himself in addition to the cabinets. They were very thorough, using a fancy laser to make sure everything was level (maybe this is standard but I was impressed by this ????). The handyman we hired for demo ran into a snafu taking the backsplash down. But Joe and his brother actually stepped in and were able to fix it and take over where he left off and I was so appreciative!
For the tile itself, we just went with this classic subway tile from Home Depot and a cool mid-tone grey grout.
Why I chose a mid-tone grey vs. a dark grey: Something to keep in mind is that I would NOT do a dark grout unless you are going to be really, really particular about who you hire to do it (i.e. make sure to ask for their portfolio of their lines with dark grout, be willing to shell out the $$$). With dark grout, you see every imperfection and the lines have to be so, so incredibly straight and precise. This is something I was told multiple times by multiple designer friends.
Sink & faucet:
I went with this Blanco sink which SO many of you raved about and said was fabulous, beautiful, and held up really well. (It doesn’t get gross and stain!) and this Kraus faucet from Wayfair that is only $130 (because I was not about to spend like $900 on a faucet that looks the same as a $130 faucet!) Both were beautiful, functional, affordable and achieved the modern/minimal look I was going for.
Also, shout out to my friend Bradley who came over and helped me figure out that a farmhouse sink would not work in our space due to how deep in needed to be. Otherwise I may have ordered a giant sink, planned the counters around it, only to have them get there on install day and tell me it wasn’t possible. YIKES. THANK YOU BRADLEY!!
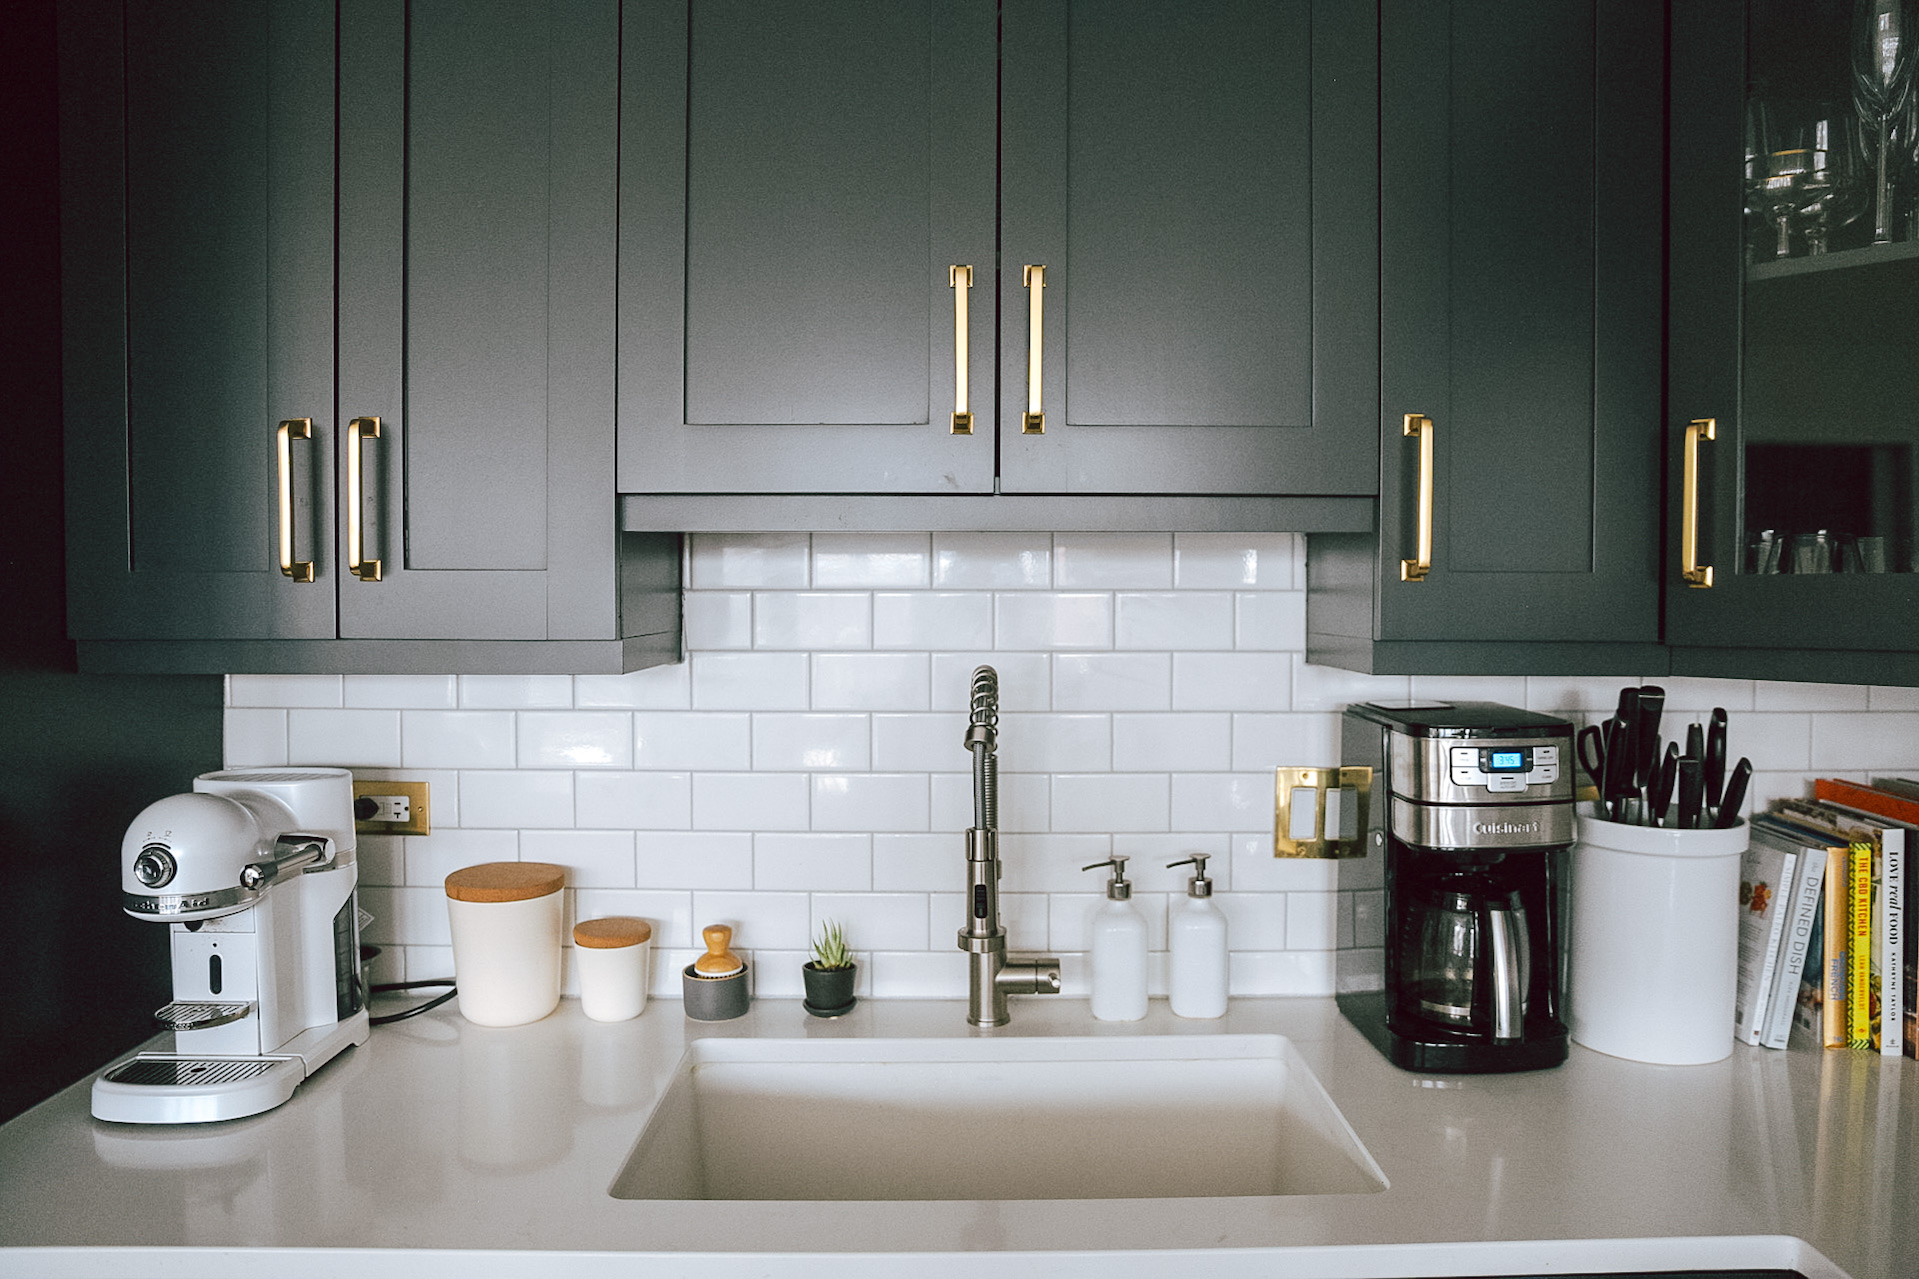
The cabinet hardware:
Last but not least, the cabinet hardware! I went with drawer pulls from Rejuvenation–the Mission cabinet pulls on the cabinets and the Mission bin pulls for the lower drawers. I had previously swapped out the existing cabinet hardware when we moved in with gold pulls from Hardware Hut, which I still highly recommend–they just didn’t match the look I was going for with this new reno. If you don’t want to splurge for Rejuvenation, definitely check them out!
Appliances:
We actually didn’t end up changing our appliances just yet. It took so long to settle on what we wanted, and by the time we had decided, many of what we’d decided on was back-ordered and we just decided to take a break. Too much kitchen stuff at once. ???? Our current appliances are fine for right now!
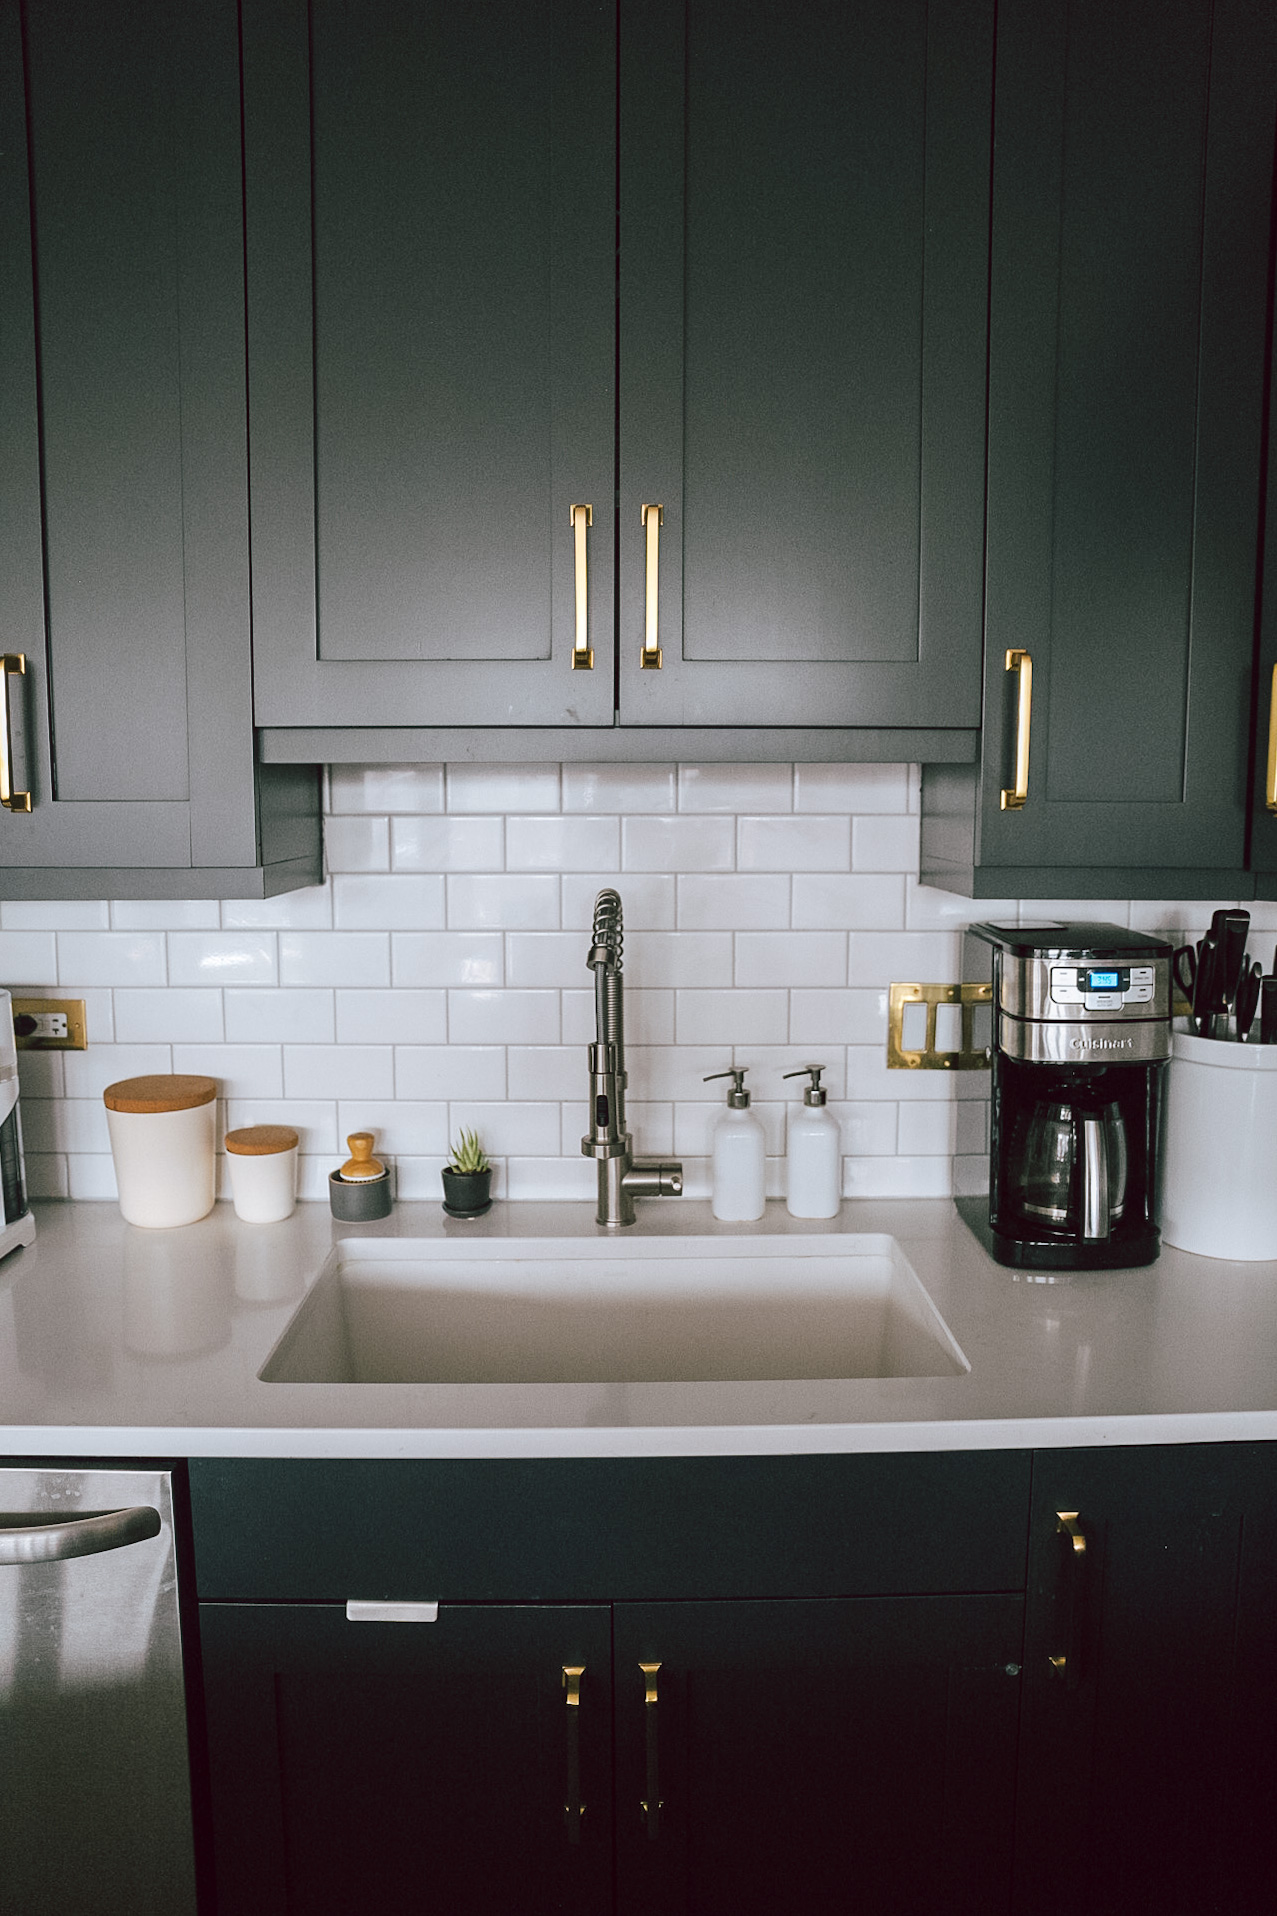
Soap dispensers: very old from IKEA // Canisters: Old from Wayfair // Pulls: Mission Cabinet Pulls // Faucet: Kraus
Watch my Kitchen Reveal Walk though on IG:
https://www.instagram.com/tv/CC_G2i4Hu1u/

